
The holiday season is a whirlwind of joy, laughter, and festivities. We decorate our homes with love, creating a warm and inviting atmosphere that captures the magic of Christmas. But as the calendar turns, it’s time to bid adieu to the holidays and put away those cherished Christmas decorations. BUT WAIT! We mustn’t forget about next Christmas. I have five tips to help you organize and put away your Christmas decor efficiently, making planning and setup for next year a breeze!
TIP #1: Before it’s Gone, Take a Photo
Before you take down your Christmas decor, grab your camera or smartphone and start snapping photos. Document the way your decorations were displayed, their location within each room, and the unique style and colors of your festive spaces.
Be sure to take a photo of the whole room in addition to close-up photos of displays. For example get photos of how you set the dining table, or how you hang Christmas Decor on the walls.
THESE PHOTOS HELP YOU TO:
- KNOW WHERE IT GOES – They help you know exactly where things go when you set up next year saving you time figuring out where to place things. Chances are by the end of the season you have things placed just how you like them including any new decor you added that season.
- KNOW WHAT YOU HAVE – The photos help you keep track of the decor you already have and where you have open space for more decor
- KNOW YOUR STYLE – They give you a way to reference the colors and decor styles you have in each room. This is especially helpful if you have different themes in each room.
Tip #2: Intentional Packing Up By Room
As you start packing up, resist the urge to throw everything into one big box. Instead, opt for a room-by-room approach. Gather items that belong together within the same room.
Let’s even take it one step further and pack things together that were displayed together.
For instance, all the decorations from your fireplace area should be stored together. This method will save you valuable time and effort when it’s time to decorate next Christmas
Tip #3: Label, Label, Label
Labeling your storage bins is a game-changer! Use easy-to-read labels, and include crucial information. Check out this blog post where I share must-have products to organize and store your Christmas decor, including recommended labels.
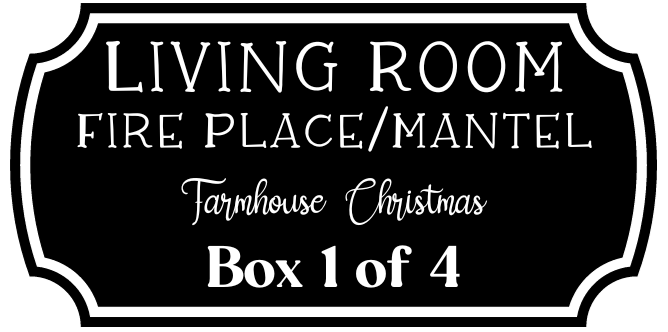
Each label should detail the room where the contents belong, the specific location within the room, the room’s style (e.g., Merry & Bright, Farmhouse Christmas), and the total number of bins for that room.
ROOM – This allows you to pull all the necessary bins to decorate a room at a time.
SECTION OF ROOM – This tells you which part of the room the decorations go.
ROOM THEME – If you have a Christmas Decor Theme for that Room, include it on the label.
BOX X of Y – This helps you know you have all the bins needed for that room.
Tip #4: Create a “Room Set-Up Guide” for Each Room
This tip might sound a bit “extra”, but trust me, it’s a game-changer in simplifying your holiday setup for next year. Create a “Room Set-Up Guide” for each room.
Here are the pieces of information your “Room Set Up Guide” will include.
ROOM NAME – This is just the room name
ROOM DECOR STYLE – If relevant, this is the Christmas Decor Style you are Using in that room. For example Merry & Bright, Farmhouse Christmas, or VIntage Christmas.
ROOM VIBE (optional) – OK, this is where I might lose you. You can take a moment to laugh at me but then come back and hear me out. Use this space to write down the vibe and feel of the room. The colors you use in the space, the types of fabrics and prints. The feeling you want the room to evoke when people are in this space. The smells that you want fill the space. You will see why this is so helpful shortly.
NUMBER OF BINS FOR ROOM – This is the total count of storage Bins for the room.
ITEMS NEEDED FOR SETUP – This is everything you need to set up the room and be able to say “This room is done!” This can be things like batteries, command hooks, twinkle lights, or room fragrances/candles. Be detailed on how much you need for each item.
WISH LIST – this is a wish list of decor items you would like to add to the room or decor crafts you would like to do for the room.
PHOTOS – Remember those photos you took before you put all your Christmas Decor away. You are going to include those photos in this document.
Make sure you can open this document on your phone—it’s super handy to have it at your fingertips while you’re out and about shopping. I’d recommend using the Notes app on your phone or something like Google Docs, so you can peek at it from both your phone and computer.
Benefits of creating a “Room Set-Up Guide”
HELPFUL WAYS TO USE THE DOCUMENT ALL YEAR
- CHECK IT BEFORE YOU BUY IT – When you find a Christmas decoration you like and want to buy but you’re not sure if it will match the style or if it will fit in the room, you can reference the photos to see if the decor item will match and if you will have space.
- INTENTIONAL BUYING – Keep track of your wish list so that during the year, you can focus on purchasing only the decor you want to buy (or craft) for that room.
- BE PREPARED – A few weeks before you start decorating, you can reference each “Room Set Up Guide” to determine what items you need to purchase so that you are ready to set up your Christmas decor.
- BE EFFICIENT- When it’s time to start decorating, you will know everything you need to start and complete the room along with where everything goes which will help you set up quickly.
Room Set-Up Guide Example
Tip#5: Store Same-Room Bins Together
Wherever you store your bins; attic, garage, shed, or a hall closet. Keep all the bins from the same room together. This makes it easier next Christmas to be able to locate all the decor for a given room.